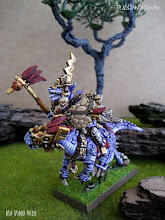
Hi there! I made a Doom Diver out of balsa wood, goblin wolf rider and a bit of grey stuff. Here's how it happened... shortly as possible!
First I used a five cent coin to draw lines on balsa, for four wheels.
I Cutted ,with my trusty carpet knife, near the pencil line, leaving just a little of the line showing on the wheel. Then I sanded the line off with sanding paper, leaving a nice round shape to the wheel.
I made some cuts to the wheels, to make them look like they were made out of planks.
Then I glued smaller pieces of balsa, to make them look more wheel-like. I also made little spots with glue, for nail effect.
Here's the frame...
Wheels glued to the frame, and vertical piece to the front.
I cutted some more balsa, and shaped the edges to look like weathered planks.
I glued the planks to the frame... and then I made the rocket... Sorry about not having pics of making it! But I hope you get the principal idea from the picture. For the rocket, I made some more planks and glued them around a wooden pin. I cutted the edges of the planks on a right angle first, like making a barrel actually :) Then I glued on the wings.
Here's the Wolf Rider, riding it. I made the rope out of iron wire, and glued the rider on the rocket. I added the "flyer goggles" out of Space Marine Scout stuff... and I realized, that I also need a base for this "rocketeer", for the FB game rules, so I made one, and covered it with planks also.
I gave the Wolf Rider some Grey Stuff treatment. I made a hood and cape, to give the figure some movement, wind under the wings, and crazyness...
From another angle...
I used Army Painters "Leather Brown" for primer...
We'll see how the paintig goes from here. I have to add some Orc stuff to the platform, like shields, and skulls, and shit... to make it look more GW like :D. And maybe a fuse to the rocket.
Fire in a hole!!! Bye now...
7 Jun 2014
17 May 2014
Black Fangs Cave: Slow Progress, and How I Made a Door
Hello. I found some hobby time from ordinary life, and decided to use it one the Pathfinder dungeon. Here's what I've got this time... Quite many pics in this post, sorry bout that!
Next Dungeon piece, made as described in my last posting. Difference here is that part of the cave wall is not "natural" cave. It's more like masoned dungeon room wall... I made the wall bricks with my sketching pen, for I didn't have the time to cut them with a knife. They turned out ok.
Here's the wall section painted and ready for action.
It's a weird shaped block.
Then I started on my first attempt (ever) for the dungeon door. I drew the lines on a piece of urethane.
Cut it in half...
Then I cut the doorways open.
At this stage, I took some material off from around the doorways, from both pieces, for I wanted to fit the door in between them.
I glued the pieces together again with hot glue, and cutted a door from balsa wood. The picture is crappy, but if you look carefully (and use your imagination), you can see the gab between the two door sections...
There it is... Just fits.
Then I painted the frames, and cutted some planks from balsa, and glued them on the door sheet.
Slide out....
Slide in... Now I can use the door as "opened" or "closed" versions.
Door planks were washed with Agrax Earthshade.
The other side.
Here's all the wall sections and new door in place on the map.
And last pic from another angle. Still lots to do with the cave, but slowly getting there. Bye now!
Next Dungeon piece, made as described in my last posting. Difference here is that part of the cave wall is not "natural" cave. It's more like masoned dungeon room wall... I made the wall bricks with my sketching pen, for I didn't have the time to cut them with a knife. They turned out ok.
Here's the wall section painted and ready for action.
It's a weird shaped block.
Then I started on my first attempt (ever) for the dungeon door. I drew the lines on a piece of urethane.
Cut it in half...
Then I cut the doorways open.
At this stage, I took some material off from around the doorways, from both pieces, for I wanted to fit the door in between them.
I glued the pieces together again with hot glue, and cutted a door from balsa wood. The picture is crappy, but if you look carefully (and use your imagination), you can see the gab between the two door sections...
There it is... Just fits.
Then I painted the frames, and cutted some planks from balsa, and glued them on the door sheet.
Slide out....
Slide in... Now I can use the door as "opened" or "closed" versions.
Door planks were washed with Agrax Earthshade.
The other side.
Here's all the wall sections and new door in place on the map.
And last pic from another angle. Still lots to do with the cave, but slowly getting there. Bye now!
11 May 2014
Black Fangs Cave: Easy 3D Dungeon Walls
Hi there! First of all, my blog has just broken the 100K views... Thanks for all who visited here! This post is about RPG for a change. While ago I re-opened my Pathfinder starter box, and got the brilliant "Black Fangs Dungeon" map out for viewing.
It's a beautifully detailed map, and works visually on it's own just fine... But I wanted something more. First I only thought of making all the smaller things, like statues, fountains, goblin beds and props in 3D. But later, I got the idea of trying to make the walls... Here's what I did.
First I drew the lines of the wall sections through a greaseproof paper.
I turned the paper around and drew the line again on a piece of polyurethane.
And there's a nice line for cutting...
I roughly cutted the piece with my trusty carpet knife.
Then I "chopped" the edges full of vertical cuts. This makes a really nice stone effect...
Finally I made few diagonal cuts and deeper gaps to the foam. The "chopping" looks great and is really fast to do... Just dont chop your fingers!
To make the wall section higher, I drew a copy of the first one, using the original as a liner.
There... a perfect copy!
Which I did'nt like, and decided to make it a bit smaller... so I made a new line, and cutted it again.
Looks better when they're not identical twins... Fastened with hot glue.
Here's another piece made in same manner, and added some sand on the edges of the first elevation. Now there's only painting left.
Allrighty... Three wall sections done, and It's time to see how the effect works. Here are the heroes, lost in a 2D dungeon.
And boom! We got walls. "What the hell"!? There was also a Cave Troll, lurking in the shadows... Heroes are flat footed now, for sure.
I added some of my old props just to see how they work together. The pics are abit flashy... sorry bout that. I painted the stone with base color of dark grey, then made two fast high light layers adding white to the mix.
I painted the top of the wall section black, to make it more abstract. I think it gives a feeling that the walls could rise alot higher. Maybe, if the top was painted stony color, it would look like the players could climb on, and over them... I dunno.
One last pic... Entering the Black Fang's dungeon. More walls coming soon. Bye now!
It's a beautifully detailed map, and works visually on it's own just fine... But I wanted something more. First I only thought of making all the smaller things, like statues, fountains, goblin beds and props in 3D. But later, I got the idea of trying to make the walls... Here's what I did.
First I drew the lines of the wall sections through a greaseproof paper.
I turned the paper around and drew the line again on a piece of polyurethane.
And there's a nice line for cutting...
I roughly cutted the piece with my trusty carpet knife.
Then I "chopped" the edges full of vertical cuts. This makes a really nice stone effect...
Finally I made few diagonal cuts and deeper gaps to the foam. The "chopping" looks great and is really fast to do... Just dont chop your fingers!
To make the wall section higher, I drew a copy of the first one, using the original as a liner.
There... a perfect copy!
Looks better when they're not identical twins... Fastened with hot glue.
Here's another piece made in same manner, and added some sand on the edges of the first elevation. Now there's only painting left.
Allrighty... Three wall sections done, and It's time to see how the effect works. Here are the heroes, lost in a 2D dungeon.
And boom! We got walls. "What the hell"!? There was also a Cave Troll, lurking in the shadows... Heroes are flat footed now, for sure.
I added some of my old props just to see how they work together. The pics are abit flashy... sorry bout that. I painted the stone with base color of dark grey, then made two fast high light layers adding white to the mix.
I painted the top of the wall section black, to make it more abstract. I think it gives a feeling that the walls could rise alot higher. Maybe, if the top was painted stony color, it would look like the players could climb on, and over them... I dunno.
One last pic... Entering the Black Fang's dungeon. More walls coming soon. Bye now!
4 May 2014
High Elves of Caledor: Sentinel with Spear
Hello! I haven't posted anything for awhile. So I thought it would be good to post at least some WIP-pics, to prove that there's still some hobby action every now and then in my life.
I have been working mostly on my RPG-Dungeon walls, and found some cheap and fast recipe for it (more of that later)... But here's something from the painting table. High Elf Spearman Champion.
I tried to keep the colors rich, and "old-school" Dragon Princelike... Some parts are not painted yet, but I'm gonna leave the spear handle black, for black is also one of the Caledorian colors. I'm also slowly learning the secrets of non-metallic gold, but need alot of practice :) And the shield is still on it's way...
Had to post this pic too, for you can see part of my new Dungeon wall set on the background :) Bye now!
I have been working mostly on my RPG-Dungeon walls, and found some cheap and fast recipe for it (more of that later)... But here's something from the painting table. High Elf Spearman Champion.
I tried to keep the colors rich, and "old-school" Dragon Princelike... Some parts are not painted yet, but I'm gonna leave the spear handle black, for black is also one of the Caledorian colors. I'm also slowly learning the secrets of non-metallic gold, but need alot of practice :) And the shield is still on it's way...
Had to post this pic too, for you can see part of my new Dungeon wall set on the background :) Bye now!
6 Apr 2014
High Elves Discipline
Hi there! I just dug out my old High Elves from the golden age of mid 90's Warhammer. Lots of unopened blisters and few plastic boxes. And ofcourse the Armybook from 1993, with some sweet pics and memories... I wanted to see how much Citizen Militia I can put together from old plastics.
I didn't put the blisters in this pic, but I'll be back with those later, for there was some nicet stuff :)
I got together 35 old Spearmen and 33 Archers. In this case, I kind of like these units with all models having the same pose. It gives the feeling of discipline, that High Elves are supposed to have. Kind of what you see in the beginning of first LotR movie. The Elvish ranks work like machines, waiting until the last moment, then cutting down the enemy with precise strikes. Love it!
I'm thinking of taking the Champion with spear out of this blister, to replace the present Spearman unit champ. There's gonna be lot of repainting of the old High Elves to the "Caledorian theme". You can see the two recently painted Caledorian Militia lurkin in the ranks. I think the units are gonna look great with this coating. Bye now!
I didn't put the blisters in this pic, but I'll be back with those later, for there was some nicet stuff :)
I got together 35 old Spearmen and 33 Archers. In this case, I kind of like these units with all models having the same pose. It gives the feeling of discipline, that High Elves are supposed to have. Kind of what you see in the beginning of first LotR movie. The Elvish ranks work like machines, waiting until the last moment, then cutting down the enemy with precise strikes. Love it!
I'm thinking of taking the Champion with spear out of this blister, to replace the present Spearman unit champ. There's gonna be lot of repainting of the old High Elves to the "Caledorian theme". You can see the two recently painted Caledorian Militia lurkin in the ranks. I think the units are gonna look great with this coating. Bye now!
Subscribe to:
Posts (Atom)